Feeling exhausted of playing Cyberpunk 2077 games because it’s full of bugs, glitches, and other problems? Relax, rather than just playing it like that, it’s better if you just install Cyberpunk 2077 MODS!
Why should you install MODS on the Cyberpunk 2077 game? Of course, because the game will be more playable if you install MODS. How come? Because MODS itself has many types, so each game can be even better if we install MODS on it.

Install Cyberpunk 2077 MODS on PC
However, even though you know that installing MODS in the game will be better, do you know how to install it? If not, it’s a coincidence because in this article Wowkia will tell you how to install Cyberpunk 2077 MODS!
Before following the method below, make sure you really know how to do it. Because, if there is a problem with your Cyberpunk 2077 file, it’s not Wowkia’s responsibility (at your own risk)
Total Time: 5 minutes
Download Cyberpunk 2077 MODS
First of all, go to the Nexus Mods website via this link and download the MODS file that you want
Drag MODS File to Desktop
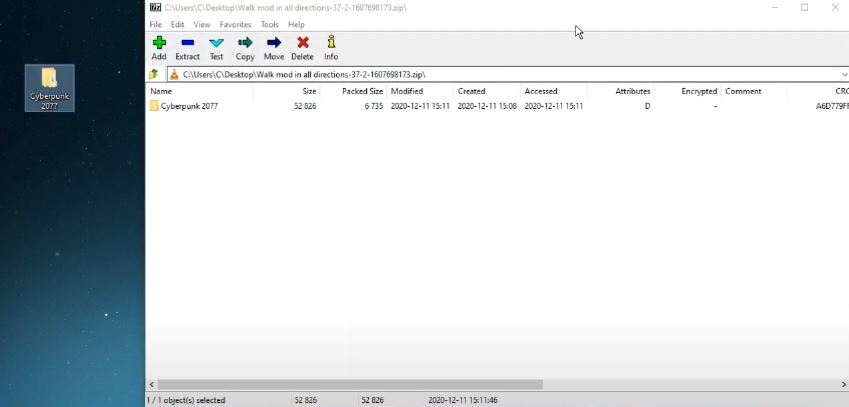
After finishing downloading the MODS file earlier, open the MODS with 7-zip or WinRar and move the file inside to your PC desktop, then open it
Open Cyberpunk 2077 Files
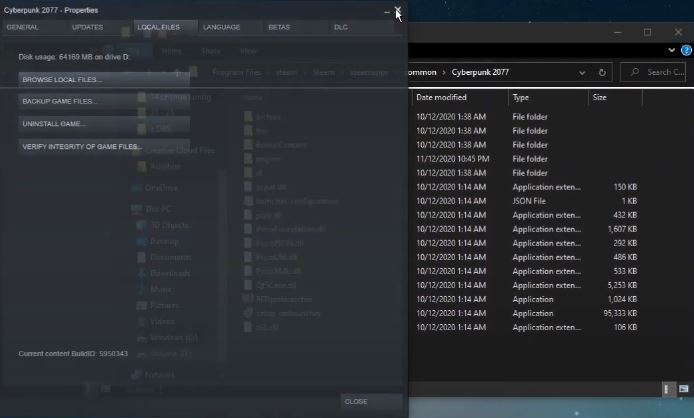
After moving the MODS file to your desktop, open Steam and right-click your Cyberpunk game, then Properties>LOCAL FILES>BROWSE LOCAL FILES
Move or Replace inputUserMappings
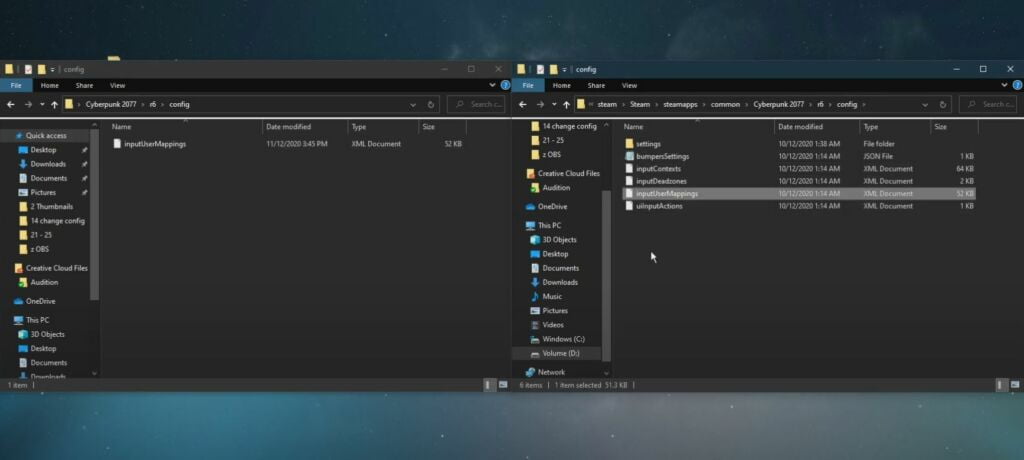
If you have followed all the directions above, now go to Cyberpunk 2077 files>r6>config>replace inputUserMappings which is in the MODS file here
That was how to install Cyberpunk 2077 MODS on a PC. What do you think about this discussion, is it helpful? If you have something to say, feel free to say it in the comments.


